Le magazine et marché mondial pour les passionnés de voitures classiques, par des passionnés.
Le magazine et marché mondial pour les passionnés de voitures classiques, par des passionnés.


Filter
Faites votre choix:
- Voir les voitures
-
Marque >>
-
Année >>
-
-
Catégorie >>
- Voir les motos
- Voir les pièces et plus
-
Marque de la voiture >>
-
Constructeur >>
-
Catégorie >>
- Vélos
-
Année >>
-
Pays



Air-Driven Tricycle Costs Little to Build and Run


It is generally known, children love (walking) bikes, paddle cars, go-karts and other (small) vehicles with at least two wheels to race against their friends on the pavement or in the schoolyard.
You can, of course, buy a pink plastic look alike Range Rover, and if you are lucky they also sell better quality wooden or iron bikes. But isn`t it much more fun to build one yourself? Together with your (grand) daughter/son, cousin, nephew or next door neighbour. Depending on the age of the child(ren) you can build a motorised vehicle or one you pull with a rope. You do not have to win a Concours, but you can of course always participate and try to win the (local) soapbox race, or show your self-built vehicle at the local fair (in the (pre-war) car world we just call them specials).
It is just about spending some quality time together and teach children how to use tools. In the magazine Popular Science Monthly of May 1922 (on page 103) we found an explanation how to build an Air-Driven Tricycle which you can use. But you can of course also use your own imagination.
Don`t forget, it is all about the fun!
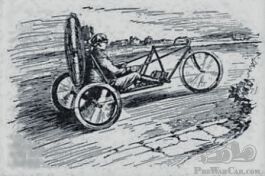
Description:
A one-cylinder motorcycle engine, a pair of small airplane wheels (or motorcycle wheels), an old bicycle, and a 2 in. by 12. by 10 ft. plank are the materials I used to make this air-driven tricycle. The motor and wheels were bought at a nearby motorcycle shop for $10.
A 5-ft. length of the plank was used for the floor of the machine. One end was bolted to the rear axle and the other end clamped to the frame of the bicycle after the rear wheel, seat, hanger, and chain were removed. The clamps were made as shown.
The motor mounting, places directly over the rear axle, was made from the remainder of the plank. A piece 18 in. long formed the back of the mounting and the sides were two pieces 20 in. long, one side of each tapering from 12 in. at the bottom to 5 in. at the top. The front was covered with a large board hinged at the side. It gives access to the interior of the motor mounting containing the gasoline tank, batteries, and coil. When closed, this door forms the back of the seat.
As the gasoline thank is lower than the carburettor, air pressure is used to force up the gasoline. This is provided with an ordinary bicycle pump.
Lag screws were passed through holes in the lugs of the motor into the motor mounting to hold it secure.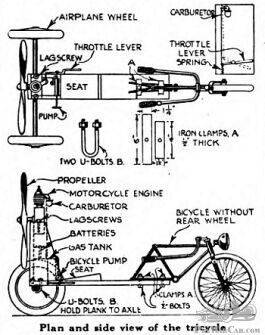
The only control is a throttle placed on the left side of the seat, arranged so that the left side of the seat, arranged so that upon pressing it down the gas-valve opens, as shown in the diagram.
The propeller was made from a No. 1 white pine 2 by 4, carefully shaped and balanced. It was fasted on the crankshaft of the motor by means of locknuts and a pin through the propeller and shaft.
By Lawrence Hamilton.
Good luck everyone! If you had success building a vehicle, or you nephew managed to screw a seat onto a plank, please send a photograph to [email protected]. We are very curious to see them!
Publié:
mercredi mai 23rd, 2018
Facebook
LinkedIn
Twitter
WhatsApp
Email
Copy
Commentaires
Fred Puhn
23 Mai 2018, 17:17
100 years ago there probably were no lawyers looking for new business so this vehicle could maim and kill without any worries about lawsuits. Imagine having an unguarded propeller carved from a piece of pine. I wonder if the century old bike had brakes on the front wheel. Also notice that you had to pump fuel with one hand and control the thing with your other. Also the heaviest item (engine) is mounted highest in the vehicle to provide easy overturning in hard corners.
Lire la suite
Philip
23 Mai 2018, 13:29
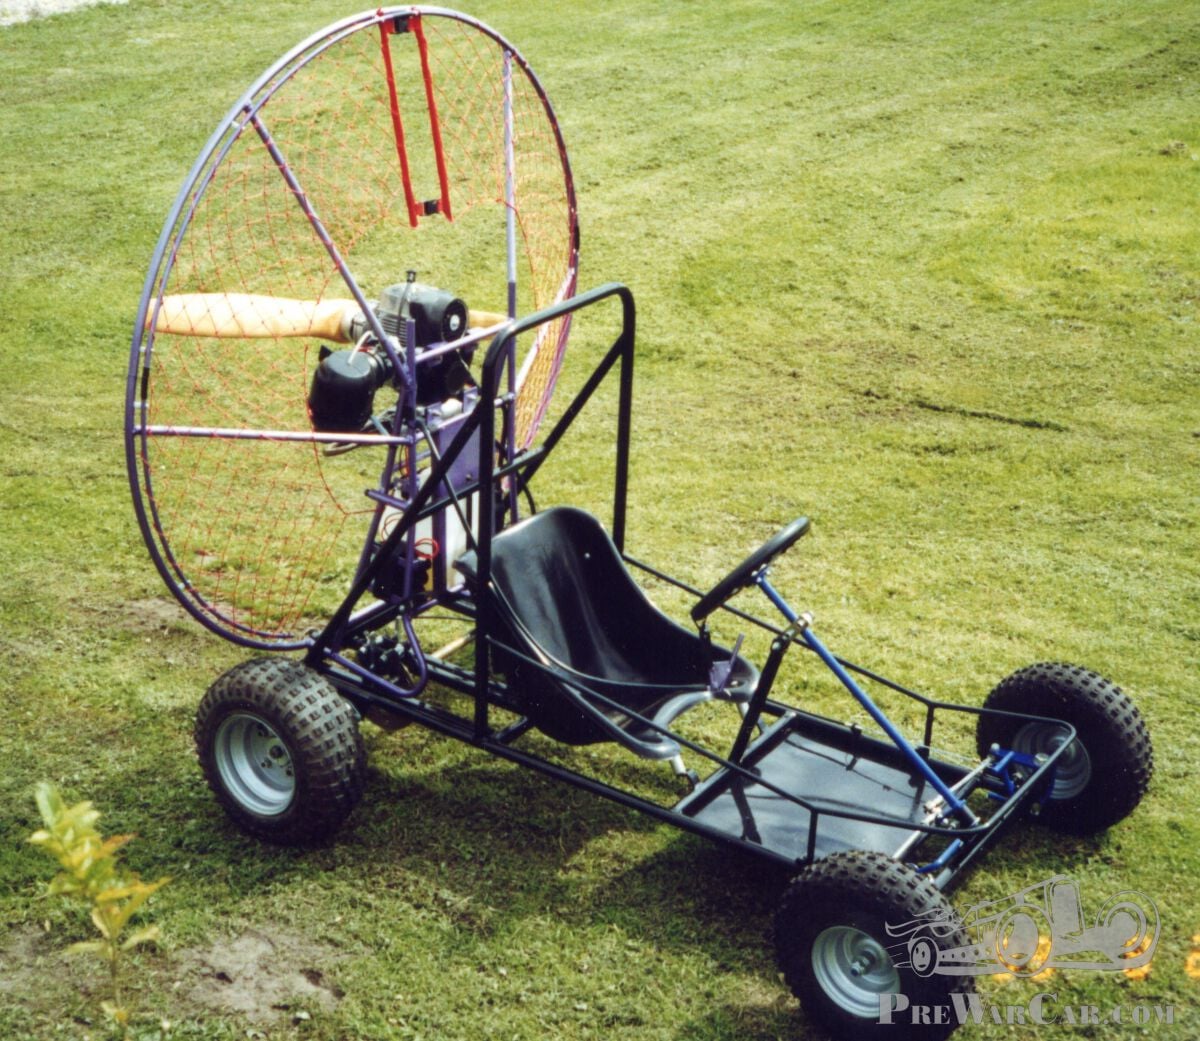
Knocked this one together this morning !!
When we are not trimming and restoring veteran and vintage cars at Redwood Engineering(UK)Ltd. We manufacture and sell Wasp off road kart kits and parts world wide. This kart was was made by us in 1999 for a parascending company to take to shows when it was too windy to fly.
We have all the bits to make your off road kart/ wheeled project work. Check out our website : http://offroadkartplans.com/
Get building and have fun,
Philip
Lire la suite
When we are not trimming and restoring veteran and vintage cars at Redwood Engineering(UK)Ltd. We manufacture and sell Wasp off road kart kits and parts world wide. This kart was was made by us in 1999 for a parascending company to take to shows when it was too windy to fly.
We have all the bits to make your off road kart/ wheeled project work. Check out our website : http://offroadkartplans.com/
Get building and have fun,
Philip
Tony Press
23 Mai 2018, 01:24
I wonder what the over officious OH&S people would make of the unguarded prop ?
Cheers, Tony.
Lire la suite
Cheers, Tony.